For example, it can notify you when a disk is running out of space, a service stops responding, or CPU usage becomes unusually high. Whether you’re monitoring a single VPS or multiple servers across different locations, Icinga 2 helps you track system health and performance from one place.
It also stores monitoring data in a database, making it easy to view historical trends, create reports, and integrate with web-based dashboards.
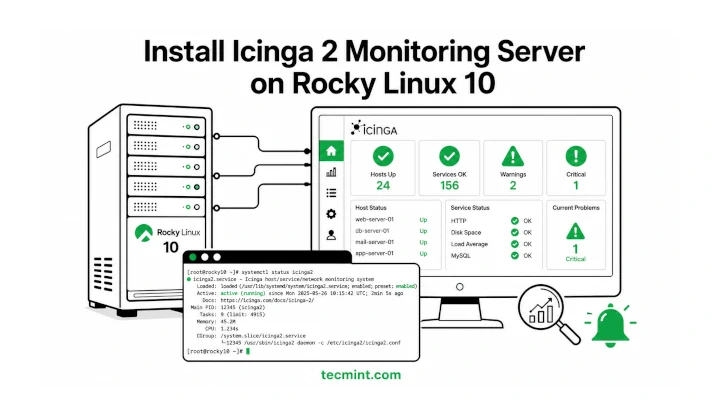
In this guide, you’ll learn how to install Icinga 2 on Rocky Linux 10. By the end, you’ll have the Icinga 2 monitoring service running, the required monitoring plugins installed, and the Icinga API enabled, which is needed if you plan to connect Icinga to a database backend or use the Icinga Web interface later.
Although this tutorial was tested on Rocky Linux 10, but the same instructions should also work on RHEL 10 and AlmaLinux 10.
Icinga 2 is a modern monitoring platform that helps administrators detect and fix problems before they affect users. It began as a fork of Nagios in 2009, but over time evolved into a completely redesigned monitoring solution with a more flexible architecture, easier configuration, and better scalability.
Unlike traditional monitoring tools that rely heavily on static configuration files, Icinga 2 uses its own configuration language, making it easier to define hosts, services, and monitoring rules. It also includes a built-in REST API, allowing administrators to automate monitoring tasks and integrate Icinga with other tools and services.
One of Icinga 2’s biggest strengths is its distributed monitoring architecture. You can run a central monitoring server and connect satellite nodes or agents across different locations, making it suitable for everything from a small home lab to a large enterprise environment.
At its core, Icinga 2 continuously performs health checks on your systems and services. When a problem is detected, it records the event and can send alerts through various notification methods so you can respond quickly.
A complete Icinga monitoring setup typically consists of four main components:
In this guide, we’ll focus on installing and configuring the Icinga 2 core monitoring engine. Once the core service is running, you’ll be ready to add a database backend and web interface in later steps.
Before you start, make sure you have:
Before installing Icinga 2, make sure your system is fully up to date, as it helps avoid package conflicts and ensures you’re working with the latest security fixes and software updates.
If the update installs a new kernel version, reboot the server so the system starts using the updated kernel:
After the server comes back online, reconnect through SSH and verify that the system is running normally before proceeding to the next step.
Icinga 2 relies on several packages that are not available in the default Rocky Linux repositories. To install these dependencies successfully, you need to enable both the CRB (CodeReady Builder) repository and the EPEL (Extra Packages for Enterprise Linux) repository.
The CRB repository provides additional development and library packages that many EPEL packages depend on. If CRB is not enabled, you may encounter dependency errors during the installation process.
First, enable the CRB repository:
Next, install the EPEL repository package:
To verify that the repositories are enabled, run:
You should see entries for both crb and epel in the repository list.
The output confirms both the CRB and EPEL repos are now active. If you skip CRB and only install EPEL, you’ll hit dependency errors when installing the monitoring plugins later. That’s the most common mistake on a fresh install.
Icinga 2 packages are not available in the default repositories, so you’ll need to add the official Icinga package repository before installation.
First, import the Icinga GPG signing key that allows DNF to verify that the packages you install are authentic and haven’t been modified.
Next, create a repository configuration file for the Icinga stable packages:
Once the repository file has been created, verify that DNF can see it:
If everything is configured correctly, you’ll see output similar to:
If no output is returned, check that the repository file exists and contains the correct configuration:
Review the contents for any typos, then run sudo dnf repolist again to confirm the repository is loaded successfully.
Now that the Icinga repository is configured, you can install the Icinga 2 monitoring engine.
On Rocky Linux 10, it’s important to install both the icinga2 package and the icinga2-selinux package, as it provides the permissions Icinga 2 needs to operate correctly when SELinux is running in enforcing mode, which is the default on Rocky Linux.
Install both packages with:
Once the installation finishes, verify that the packages were installed successfully:
You should see entries similar to:
At this point, Icinga 2 is installed, but it can’t actually monitor anything yet. Think of Icinga 2 as the monitoring engine that schedules checks and processes results, but the actual checks are performed by external monitoring plugins, and each plugin is designed to test a specific service or resource, such as disk usage, CPU load, memory consumption, website availability, or network connectivity.
For example:
The easiest way to install the complete plugin collection is to install the nagios-plugins-all package from EPEL:
After installation, the plugins are stored in /usr/lib64/nagios/plugins/ and you can verify that the plugins were installed successfully by listing the directory contents:
The output should show dozens of available check commands, including check_disk, check_http, check_ping, check_load, and many others.
Icinga 2’s default configuration already knows where these plugins are located, so you don’t need to modify any paths or configuration files. As soon as the plugins are installed, Icinga can begin using them to monitor hosts and services.
With Icinga 2 and the monitoring plugins installed, it’s time to start the monitoring service.
Next, verify that the service is running correctly:
A healthy installation should display something similar to:
If the service status shows failed instead of active (running), check the service logs for error messages:
The Icinga 2 API allows external components to communicate with the monitoring engine such as IcingaDB, Icinga Web 2, distributed monitoring, and automation tools all rely on the API being enabled.
By default, the API feature is not configured, so you’ll need to run the built-in setup command to generate the required certificates and configuration files.
You should see output similar to the following:
Now restart your Icinga 2 daemon to finish the installation!
The Icinga 2 API listens on TCP port 5665, so confirm that the service is accepting connections, run:
A successful result looks similar to:
If your server is running firewalld (the default firewall service), you’ll need to allow incoming connections on port 5665.
With the firewall configured, your Icinga 2 server is ready to accept secure API connections from other Icinga components and monitored systems.
Before moving on, it’s a good idea to verify that the Icinga 2 configuration is valid. Even if you’ve only followed the installation steps so far, running the configuration check helps confirm that all required files, modules, and settings are loaded correctly.
Icinga 2 includes a built-in validation tool that checks configuration syntax and verifies references between objects.
A successful validation will produce output similar to:
The most important line is:
Once the configuration validates successfully, your Icinga 2 installation is fully operational and ready for monitoring hosts and services.
At this stage, you have a fully functional Icinga 2 monitoring server running on Rocky Linux 10 wiht the monitoring engine, the monitoring plugins are installed, the API is enabled, and the configuration has been validated.
However, everything is currently running behind the scenes, but there is no web dashboard yet, and monitoring data is not being stored in a database. To build a complete monitoring platform, you’ll need to add the remaining Icinga components.
A production-ready Icinga deployment typically includes:
The complete setup is covered in the Icinga 2 Complete Monitoring Series on Pro TecMint, which is divided into four practical chapters.
In this guide, you installed Icinga 2 on Rocky Linux 10, enabled the required repositories, installed the monitoring plugins, configured the API, opened the firewall, and verified that the service is running correctly.
You now have a working Icinga 2 core installation that’s ready to be connected to IcingaDB and a web dashboard in the next stage of your deployment.
Now that your monitoring server is ready, what are you planning to monitor first? A website, a database server, application services, or basic system resources such as CPU, memory, and disk usage? Let us know in the comments and share how you’re using Icinga in your environment.
Cockpit on Rocky Linux 10: Full Server Management Without SSH
Install Rocky Linux 10 Remotely via RDP on a Headless Server
Create a Self-Signed SSL Certificate for Apache on Rocky Linux 10
Upgrade Rocky Linux 9 to Rocky Linux 10.1
Rocky Linux 10 Minimal Server Installation Guide
How to Install Apache, MySQL/MariaDB and PHP in Linux
Hi Team,
I am getting the below error message while installing the rpm forge packages. Could you please assist me on this.
# rpm -Uvh http://pkgs.repoforge.org/rpmforge-release/rpmforge-release-0.5.3-1.el6.rf.x86_64.rpm
Retrieving http://pkgs.repoforge.org/rpmforge-release/rpmforge-release-0.5.3-1.el6.rf.x86_64.rpm
curl: (7) Failed to connect to pkgs.repoforge.org port 80: Connection timed out
error: skipping http://pkgs.repoforge.org/rpmforge-release/rpmforge-release-0.5.3-1.el6.rf.x86_64.rpm – transfer failed
Thanks
Unfortunately, repoforge is currently unmaintained and outdated by its maintainers and seems to be decommissioned very soon. Try to use EPEL repositories project instead.
I have been currently using SeaLion (https://www.sealion.com/) for monitoring my servers, as it enables me to stay on top of my servers at all times. It’s a very user friendly Linux server monitoring tool. Also has features like jump back in time for historical analysis. SeaLion helps in monitoring the server health and staying on top of your Linux servers at all times.It helps in keeping up with the performance of the Linux servers by real time monitoring and alerting.
Key Features
Jump back in time
Custom metrics
Custom commands
Real time Monitoring
View Raw outputs
Receive alerts
FREE 14-Day Trial. TRY Sealion- Server monitoring in just 2 steps!!
Hello,
I’m installing Icinga in CentOS7, and I arrived to the step 11, but the following link (the link you publish) rpm -Uvh http://ftp.ines.lug.ro/fedora/epel/beta/7/x86_64/epel-release-7-0.2.noarch.rpm is not working !!!!
When I execute the command, it returns an error saying:
The requested URL returned error: 404 Not Found
Please Help
Thank’s in advance
@Somia,
Thanks, we’ve added working link now, could you please check and confirm..
I’m sorry but the team decided to uninstall it. They said that it is not secure to have it in the server and it is not answering our request which is to monitor the logs (if there is any attacks) [we’re students and we made a web site which should be secure and is attacked by other students]
any solution you suggest please?
Try
http://ftp.ines.lug.ro/fedora/epel/beta/7/x86_64/epel-release-7-7.noarch.rpm
worked for me.
The epel release download link pagages change often. In order to stay up to date with the latest release links visit the following links to download the rpm packages:
https://fedoraproject.org/wiki/EPEL
@sarfaraz: To monitor client machines internal services you must install Nagios NRPE. Client external services can be monitored directly from Icinga server.
At step 10, you forgot to add the user in the first cmd line:
# htpasswd -cm /etc/icinga/passwd icingaadmin
Corrected in the write-up and thanks for informing..
never ever disable SElinux
Hi, icinga 1 vs icinga2?, which is the best?
It does not require any client side installation? How to configure client machine ?
It does not require any client side installation
Please, please, please, don’t teach bad sysadmin examples 😉 SELinux is there for a reason, i’m tired of seeing people disabling it as soon as it interferes with their expectations. Please teach how to correctly configure it!
Also copying files to /etc, /usr and /var bypassing the package manager is a very bad habit. Please install those files in /usr/local or /opt instead!!
Our Icinga for 3338 network hosts (right now, our network grow every day) works well enough on Debian server, but we modified it a little when compiled from sources. And don’t forget about something like NConf and SQL – it’s very useful.
For RHEL/CentOS 6 will work surely, just add repoforge repositories and you can install from binaries.
Will it work for Redhat 5 and 6 ???
Duf – A Better Linux Disk Monitoring Utility
Monitorix – A Linux System and Network Monitoring Tool
How to Use Nmap Script Engine (NSE) Scripts in Linux
How to Monitor Node.js Applications Using PM2 Web Dashboard
6 Open Source Tools to Monitor MySQL Performance in Linux
Darkstat – A Web Based Linux Network Traffic Analyzer
How To Install and Use Android Debug Bridge (adb) in Linux
Deprecated Linux Networking Commands and Their Replacements
15 Useful “ifconfig” Commands to Configure Network Interface in Linux
How to Find a Specific String or Word in Files and Directories
Different Ways to Create and Use Bash Aliases in Linux
40+ Linux Commands for a Better Machine Learning Workflow
11 Best GUI Tools for Linux System Administrators in 2024
7 Best Audio and Video Players for Gnome Desktop
9 Best Free UPnP and DLNA Servers for Linux in 2024
6 Best Modern Linux ‘init’ Systems (1992-2025)
10 Best Linux File and Disk Encryption Tools (2024)
6 Best Linux Apps for Downloading Movie Subtitles
—
**📚 Original Source:**
[How to Install Icinga 2 Monitoring Server on Rocky Linux 10](https://www.tecmint.com/install-icinga2-monitoring-rocky-linux-10/)